Chord Shapes
To start out, play through these four chord shapes in both C Major and D Major. Notice that the only shape that differs in this instance is the first one, the C Major shape. This is because in the Key of C Major the C Major Shape uses open strings. As we shift that shape up two frets to play D major, we need to use the barre.
As we go through the various scale shapes refer back to these chords to understand the relationship between chord shapes and scale shapes.

The C Major Shape – 1 Octave
Now that we will go through the scale shapes that align with the chord shapes above, we will come across the same one exception that pertains to the C Major shape. In the key of C Major the C Major shape uses the open strings, however, in the key of D Major the C Major shape scale uses a different fingering as the open strings are not in use.

The A Major Shape – 1 Octave
The A Major shape has identical fingering in the two keys of C Major and D Major. The one key where the A Major shape would change fingering is in the key of A Major, because it would use open strings.
The arpeggio in this shape is not as simple as holding down a chord shape in the left hand (as we did in the C Major Shape), because there is an interval of a 5th between the lowest two notes in the chord (on the 5th and 4th strings). As a major arpeggio comprises of the root, 3rd and 5th we will need to play the arpeggio with a fingering that allows the third of the scale to be played. So, even through the arpeggio has that third added in we can still see the resemblance of the A Major Chord shape when we play the arpeggio.

The G Major Shape – 1 Octave
The G Major scale shape starts on the sixth string, so we will be playing in the fifth position for C Major and the seventh position for D Major. Remember that the position is defined by where the first finger is playing. Once again, in these two keys, we have identical fingering so we just need to shift the entire shape by two frets.
In this scale shape, there is an extension in the left hand when we get to the fourth string. This involves splaying the fingers out over a five fret distance and then returning to our normal position on the adjacent strings.
The arpeggio in this shape is once again a clear outline of the G Major Chord Shape.

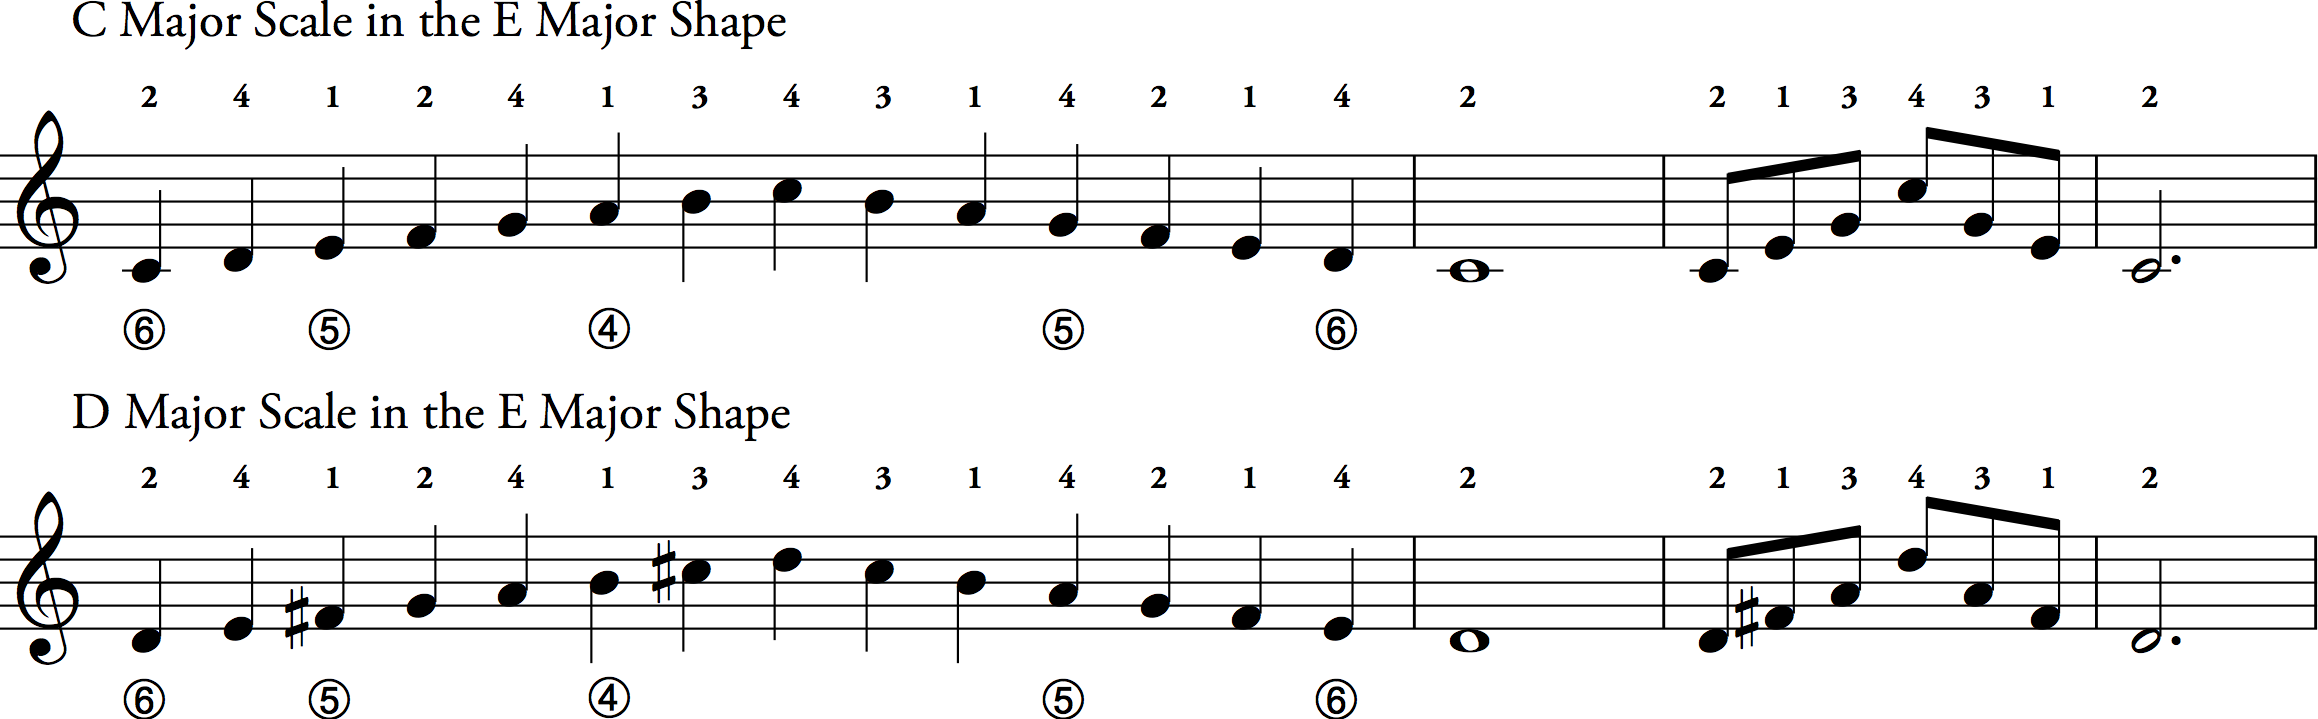
The E Major Shape – 1 Octave
The E Major scale shape is perhaps the most common shape of all. It fits nicely into one position and can span two octaves without any shifting.
Once again we find that between the keys of C Major and D Major the fingering is identical. The exceptions would be … you guessed it… when we play down in the first position and use the open strings. The E major Shape in the Key of F Major uses open strings. In the Key of E Major you will find that this shape does not work in first position and we have to do a completely unique fingering to suit the key.
The arpeggio in this shape has the same issue as the A Major Shape (that the bottom two notes span the interval of a fifth, thereby skipping the third of the arpeggio) so we need to adapt the fingering.
Now that you have played these scale shapes in the key of C Major and D Major, it is not a big step to shift the shapes around and explore other keys.
This system, as you will find, opens up the fingerboard considerably, but each shape has areas of the fingerboard where it doesn’t work or it isn’t practical.
Hi!
The second notes in the A shapes are not played on the fourth string, right?
Hi Marten,
Right you are! That second note is also on the fifth string, while the third, fourth, and fifth notes are played on the fourth string. Thanks for the correction!
Peace,
Dave B (CGC team)